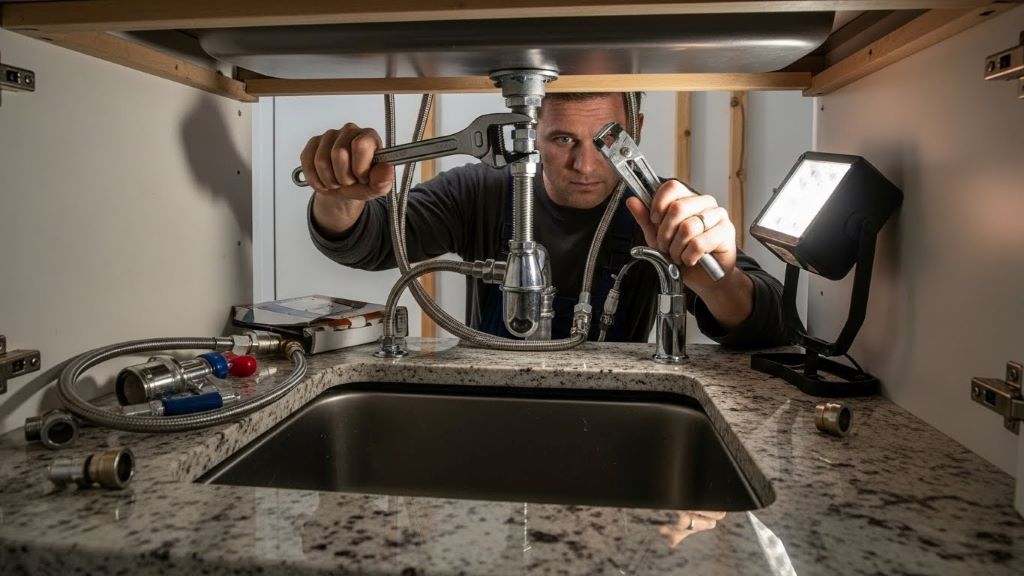
Replacing a kitchen faucet on granite countertops might seem challenging at first. However, with the right tools and guidance, you can complete this project successfully. This guide walks you through each step to help you replace your faucet without damaging your beautiful granite surface.
Why Replace Your Kitchen Faucet
Kitchen faucets wear out over time. You might notice drips, leaks, or reduced water pressure. Additionally, an outdated faucet can make your entire kitchen look tired. A new faucet improves functionality and enhances your kitchen’s appearance. According to HGTV, kitchen upgrades like faucet replacement can increase your home’s value.
Granite countertops require special care during faucet replacement. The stone is durable but can chip or crack if handled incorrectly. Therefore, taking proper precautions protects your investment.
Tools and Materials You Will Need
Before starting, gather all necessary tools and materials. This preparation saves time and prevents frustration during the installation process.
Essential tools include an adjustable wrench, basin wrench, plumber’s putty, Teflon tape, flashlight, bucket, towels, and safety glasses. You will also need your new faucet with all included hardware and supply lines if not included with the faucet.
Having everything ready makes the job smoother. Consequently, you can work efficiently without constant interruptions.
Preparing Your Work Area
Start by clearing out the cabinet under your sink. Remove all items to create ample working space. Next, lay down towels to protect the cabinet floor from water spills.
Turn off the water supply valves located under the sink. These valves typically turn clockwise to close. After closing the valves, turn on the faucet to release any remaining water pressure. This step prevents unexpected water flow during removal.
Place your bucket under the supply lines. This catches any residual water when you disconnect the lines. Additionally, keep extra towels handy for quick cleanups.
Removing the Old Faucet
Disconnecting the supply lines comes first. Use your adjustable wrench to loosen the nuts connecting the supply lines to the shut-off valves. Water will drain into your bucket, so position it carefully.
Next, locate the mounting nuts under the sink. These nuts secure the faucet to the countertop. Use a basin wrench to reach these nuts in tight spaces. Turn counterclockwise to loosen them completely.
Sometimes, old faucets have corroded connections. Therefore, applying penetrating oil and waiting ten minutes can make removal easier. Once the mounting nuts are off, lift the old faucet straight up from above the countertop.
Clean the area thoroughly after removal. Remove old plumber’s putty or silicone with a plastic scraper. Avoid metal scrapers that might scratch your granite. Then, wipe the surface with a damp cloth to ensure a clean installation area.
Checking Granite Holes and Compatibility
Examine the existing holes in your granite countertop. Most faucets require either one hole or three holes. Measure the distance between holes if you have multiple openings.
Your new faucet must match your existing hole configuration. However, some faucets include an escutcheon plate that covers extra holes. This plate provides flexibility when replacing different faucet styles.
Inspect the granite edges around the holes for any chips or damage. Small chips can often hide under the new faucet base. Nevertheless, larger damage might need professional repair before installation.

Installing the New Faucet
Read the manufacturer’s instructions completely before beginning installation. Each faucet model has specific requirements that ensure proper function and warranty coverage.
Place the rubber gasket or deck plate onto the faucet base if included. This gasket creates a watertight seal against your granite. Some faucets require plumber’s putty instead. Roll the putty into a rope and press it around the faucet base.
Carefully feed the supply lines through the countertop holes from above. Lower the faucet into position, ensuring proper alignment. The faucet should sit flat against the granite surface.
From underneath, thread the mounting nuts onto the faucet tailpieces by hand first. Then, tighten them with your basin wrench. Alternate between nuts if there are multiple mounting points. This ensures even pressure distribution. Avoid overtightening, which can crack the granite.
Connecting Water Supply Lines
Wrap Teflon tape around the threads of the shut-off valves. Wind the tape clockwise three to four times for a secure seal. This prevents leaks at the connection points.
Attach the supply lines to the shut-off valves. Hand-tighten first, then use your adjustable wrench to snug them. Again, avoid excessive force that might damage the connections or valves.
Connect the supply lines to the faucet tailpieces from underneath. Follow the manufacturer’s specifications for tightening. Some faucets use quick-connect fittings that simply push on and lock in place.
Double-check all connections before proceeding. Each connection should feel firm but not overly tight. Additionally, ensure the supply lines are not kinked or twisted.
Testing for Leaks
Slowly turn on the water supply valves counterclockwise. Open them gradually while watching for leaks. This controlled approach lets you catch problems immediately.
Check every connection point carefully. Look at the shut-off valve connections, supply line connections, and the faucet base. Run your hand along each connection to feel for moisture.
Turn on the faucet and let water run for several minutes. Test both hot and cold water. Switch between stream and spray settings if your faucet has multiple functions. Meanwhile, continue monitoring underneath for any drips.
If you find leaks, turn off the water immediately. Tighten the leaking connection slightly. Then, test again. Sometimes, connections need minor adjustments to seal properly.
Sealing Around the Faucet Base
After confirming no leaks exist, address the seal around your faucet base. Some installations use the gasket alone, while others benefit from additional sealant.
If using silicone caulk, apply a thin, even bead around the faucet base. Smooth it with your finger or a caulk tool. Clear or color-matched caulk works best on granite. This extra seal prevents water from seeping under the faucet.
Wipe away excess caulk immediately with a damp cloth. Allow the caulk to cure according to the product instructions before heavy use. Typically, this takes 24 hours for full curing.
Finishing Touches and Cleanup
Remove the aerator from your new faucet and run water for one minute. This flushes debris from the supply lines that accumulated during installation. Then, reinstall the aerator.
Clean your granite countertop around the new faucet. Use a granite-safe cleaner to remove fingerprints and residue. Polish the faucet with a soft cloth to make it shine.
Replace all items in the cabinet under your sink. Dispose of your old faucet according to local regulations. Many areas accept old fixtures at recycling centers.
Tips for Granite Countertop Care
Granite requires gentle handling during any plumbing work. Never place heavy tools directly on the surface. Use towels or rubber mats as protective barriers.
Avoid dropping wrenches or other metal tools on granite. Even small impacts can cause chips. Therefore, work carefully and deliberately throughout the installation.
If you notice any damage after installation, consult a professional stone repair service. According to Forbes, professional granite care maintains your countertop’s value and appearance.
Clean up water spills immediately during and after installation. While granite is water-resistant, prolonged exposure to water can cause issues. Furthermore, standing water might seep into seams or edges.
When to Call a Professional
Some situations warrant professional help. If your granite has significant damage around the faucet holes, a stone specialist should evaluate the issue first. Additionally, if you need new holes drilled in granite, hire an experienced contractor with diamond-core bits.
Complex faucet systems with built-in filtration or instant hot water dispensers often require specialized knowledge. Similarly, if your plumbing connections are corroded or damaged, a licensed plumber ensures safe repairs.
Don’t hesitate to seek help if you feel uncomfortable at any stage. Professional installation provides peace of mind and protects your granite investment.
Conclusion
Replacing a kitchen faucet on granite countertops is a manageable DIY project with proper preparation and care. By following these steps, you can successfully install a new faucet while protecting your valuable granite surface. Remember to gather all tools beforehand, work carefully to avoid damaging the stone, and test thoroughly for leaks. With patience and attention to detail, your new faucet will provide years of reliable service while enhancing your kitchen’s beauty and functionality.
Frequently Asked Questions
Can I replace a kitchen faucet myself on granite countertops?
Yes, you can replace a kitchen faucet on granite countertops yourself. The process requires basic plumbing tools and careful handling to avoid damaging the stone. Follow manufacturer instructions and work methodically for best results.
Do I need special tools for granite countertop faucet replacement?
No special tools are required beyond standard plumbing tools. You need an adjustable wrench, basin wrench, and basic supplies. However, use caution to avoid dropping metal tools on the granite surface.
How do I avoid cracking granite when tightening faucet mounting nuts?
Tighten mounting nuts gradually and evenly. Alternate between multiple mounting points to distribute pressure. Hand-tighten first, then use a wrench for final snugging. Never overtighten, as excessive force can crack the granite.
What should I do if my new faucet holes don’t match the granite openings?
Check if your new faucet includes a deck plate or escutcheon that covers extra holes. Many faucets offer adapters for different configurations. If holes need drilling, hire a professional with diamond-core bits designed for granite.
How long does it take to replace a kitchen faucet on granite countertops?
Most faucet replacements take two to four hours for DIYers. This includes removal, installation, and testing. Experience level and faucet complexity affect the timeline. Allow extra time for your first replacement project.
Related Topics:
Does Butter or Margarine Damage Non-Stick Pans?
The Future of Cooking: Smart Kitchen Innovations to Watch