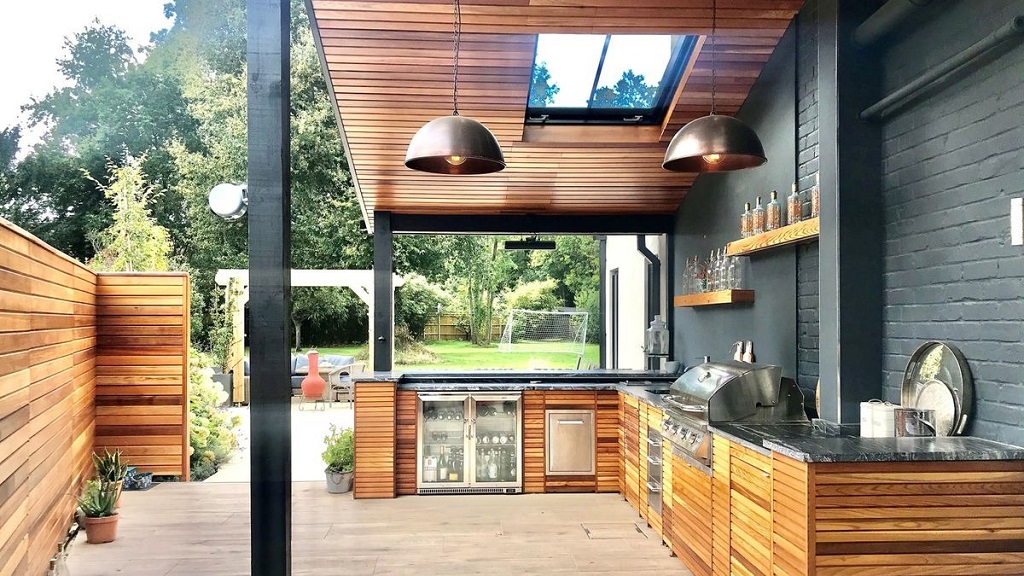
Imagine firing up the grill while friends chat nearby. You flip burgers. Laughter fills the air. This scene happens right in your yard. An outdoor kitchen makes it real. You cook outside. You stay with the party. No more running indoors.
People love this setup. A 2024 Houzz report shows 35% of homeowners added outdoor kitchens last year. Another stat from the National Association of Home Builders notes these spaces boost home value by up to 10%. You get fun now. Your house gains appeal later.
This guide walks you through it all. You learn budget tricks. pick cheap yet tough materials. You follow simple plans. Start small. Grow over time. Your dream backyard spot waits.
Why Add an Outdoor Kitchen to Your Backyard?
You crave fresh air meals. An outdoor kitchen fits that bill. It turns your yard into a hub. You grill steaks. You mix salads. Guests mingle close.
Think family dinners under stars. Or weekend barbecues with neighbors. These spaces spark joy. They cut indoor mess too. Clean up happens outside.
Benefits stack up. You save time on big meals. You bond over cooking. Plus, fresh herbs from nearby pots add zip. Your yard feels alive.
Plan Your Outdoor Kitchen Design
Planning sets the tone. You sketch ideas first. Measure your space. Note sun paths. Check for shade.
Draw a rough layout. Place the grill central. Add prep area nearby. Include seating. Keep flow smooth.
Use free tools online. Sites like RTA Outdoor Living offer 3D planners. You drag elements. You see it live.
Focus on zones. Prep zone holds knives and boards. Cook zone fits grill and tools. Serve zone has plates ready. Clean zone needs a sink spot.
Match your style. Go rustic with wood accents. Or sleek with metal lines. Trends for 2025 lean modular. You swap pieces easy.
Budget tip: Start with basics. Grill, counter, storage. Add later.
Choose Affordable Materials for Durability
Materials make or break your build. Pick ones that last. They fight rain, sun, heat.
Concrete shines for counters. You pour it yourself. It molds to shapes. Seal it for stain resistance.
Tile works great too. Grab remnants from stores. Lay patterns for pop. Grout seals edges.
For cabinets, try HDPE plastic. It recycles easy. Resists bugs and rot. Lighter than wood.
Stucco coats frames cheap. Smooth finish hides flaws. Add color for vibe.
Wood? Select teak or cedar. They weather well. Seal yearly.
Avoid soft pine. It warps fast.
Sustainable picks matter. Use reclaimed bricks. They add charm. Quartz counters from recycled glass gleam.
| Material | Best Use | Pro | Con |
| Concrete | Counters | Cheap, custom | Heavy |
| Tile | Backsplash | Patterns galore | Grout needs care |
| HDPE | Cabinets | Eco-friendly | Less wood feel |
| Stucco | Walls | Easy apply | Cracks in cold |
Essential Appliances and Fixtures on a Budget
Appliances drive the fun. Start with a solid grill. Portable ones slide in easy. Built-ins save space.
Look for multi-use. A grill with side burner cuts needs. Add a smoker box for flavor.
Fridge? Compact models chill drinks. Plug into outdoor outlet.
Sink hooks to hose. No plumber needed. Add a faucet drip pan.
Lighting counts. Solar LEDs string cheap. They glow soft at dusk.
Fixtures like hooks hold tools. Pegboards organize spices.
Shop sales. Brands like Weber offer deals. Reuse indoor pots.
Step-by-Step Guide to Building Your Outdoor Kitchen
Ready to build? Follow these steps. You handle most solo. Call pros for gas lines.
Step 1: Prep the Site
Clear grass. Level ground. Dig for base. Add gravel. Tamp flat.
Step 2: Lay the Foundation
Pour concrete slab. Or use pavers. They interlock tight. Let cure days.
Step 3: Frame the Structure
Use pressure-treated lumber. Cut to plan. Bolt secure. Add cross-braces.
Step 4: Install Cabinets and Counters
Bolt cabinets down. Shim level. Clamp counters. Caulk edges.
Step 5: Add Appliances
Wire electrics safe. Hook gas careful. Test seals.
Step 6: Finish Walls and Details
Stucco or tile up. Seal all. Add hooks and shelves.
Step 7: Landscaping Touches
Plant herbs around. Mulch edges. String lights.
Tools needed: Saw, drill, level, trowel. Rent big ones.
Time: Weekend warriors finish in two. Pace yourself.
Budget-Friendly Outdoor Kitchen Ideas and Layouts

Keep costs low with smart layouts. L-shape hugs walls. Saves steps.
Island style centers action. Roll it if needed.
Small yard? Go linear. Grill, sink, storage in row.
Incorporate trends. 2025 loves earth tones. Mix textures like stone and wood.
DIY hack: Stack cinder blocks. Top with wood. Instant counter.
Modular kits assemble fast. From IKEA hacks to prefab frames.
Examples: Sarah in Texas built hers for under $2,000. Used pallets for base. Added thrift store finds.
John’s coastal setup uses recycled glass counters. Waves crash nearby. Guests rave.
Incorporate Sustainable Practices
Green choices save cash long-term. Use LED lights. They sip power.
Solar panels charge small fans. Cool cooks off.
Rain barrels water plants. Herbs thrive near kitchen.
Compost scraps. Feed garden veggies.
Materials: Bamboo shelves resist mold. Recycled metal shelves shine.
Layout tip: Orient for breeze. Cut AC use inside.
Your build helps planet. Feels good too.
Avoid Common Mistakes When Building on a Budget
Rookie errors cost time. Plan utilities first. Run lines before pour.
Skip cheap wood frames. They rot quick. Opt cement board backer.
Don’t crowd layout. Leave elbow room. 36 inches between spots.
Test drainage. Water pools wreck bases. Slope away.
Overlook shade. Add pergola early. Sun fades colors.
Budget creep hits hard. List all. Add 20% buffer.
Vent grills right. Smoke chokes fun.
Learn from others. Forums share fixes.
Enhance Your Outdoor Kitchen with Lighting and Seating
Light sets mood. Path lights guide feet. Overhead cans focus tasks.
Seating invites stay. Benches line counters. Stools tuck under.
Mix high-low. Adirondack chairs cozy. Bar height stools chatty.
Add pillows. Weatherproof ones pop color.
Fire pit nearby warms nights. Logs crackle soft.
Your space flows. Guests linger.
Maintenance Tips for Long-Lasting Outdoor Kitchens
Keep it fresh easy. Hose counters weekly. Scrub stains quick.
Seal wood yearly. Brush on protectant.
Check cabinets for cracks. Caulk gaps.
Winter prep: Cover appliances. Drain lines.
Clean grill grates. Vinegar shines.
Store tools dry. Hooks prevent rust.
Routine pays off. Yours looks new always.
Related Topics: Sintered Stone vs Porcelain Countertops
Conclusion
You now hold the blueprint. Plan smart. Pick tough materials. Build steady. Your outdoor kitchen blooms on budget.
Gather supplies this weekend. Sketch tonight. Grill soon.
What step starts your project? Dive in. Enjoy the feasts.
Related Topics: Store Bulk Spices After Buying
FAQs
How much space do I need for a budget outdoor kitchen?
Aim for 100 square feet minimum. This fits grill, counter, and seating. Measure your yard. Adjust for flow.
What is the cheapest way to build an outdoor kitchen?
Use cinder blocks and concrete counters. Add a portable grill. Total stays under $1,500 with DIY.
Can I build an outdoor kitchen without plumbing?
Yes. Use a hose sink. Bottled water works. Add real later if needed.
What materials hold up best in wet climates?
Stainless steel and sealed concrete. They shrug rain. Avoid untreated wood.
How do I make my outdoor kitchen eco-friendly on a budget?
Choose recycled plastics for cabinets. Add solar lights. Plant native herbs. Small swaps add up.